Glass Bottle Recycling Ideas That Spark Joy and Sustainab...
- 时间:
- 浏览:87
- 来源:Custom Glass Bottles
Glass bottle recycling isn’t just about dropping empties in the blue bin. It’s about reclaiming material with intention—transforming something discarded into something meaningful, functional, or beautiful. In 2024, U.S. recycling facilities recovered only 31% of glass containers (Updated: April 2026), down from 33% in 2022 due to contamination and shifting MRF economics. That gap is where hands-on reuse shines: not as a replacement for systemic recycling, but as a tactile, low-barrier entry point to circular thinking.
Most people stash wine bottles, sauce jars, and soda containers for ‘someday’ projects—then forget them. But the real bottleneck isn’t time or skill. It’s clarity: *Which ideas actually work? Which hold up? Which don’t require a kiln or $200 in tools?*
Below are 9 field-tested glass bottle recycling ideas—each selected for durability, accessibility, and aesthetic payoff. No fluff. No ‘just glue some twine and call it done’. Every idea includes realistic prep notes, common pitfalls, and where to stop if you hit friction.
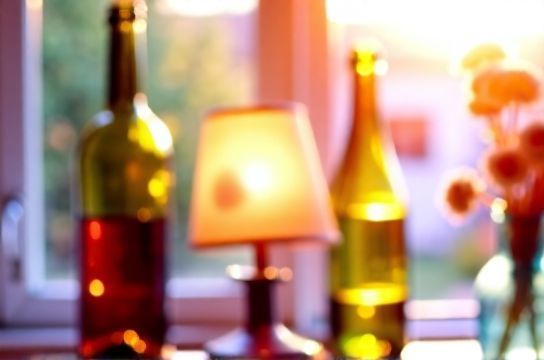
1. Glass Bottle Lamps: Functional Light, Not Just Mood
A glass bottle lamp is more than ambiance—it’s wiring safety, structural integrity, and light diffusion in one. Skip the YouTube tutorials that skip voltage ratings or bottle thickness testing.Start with stout, thick-walled bottles (e.g., Bordeaux red wine, olive oil, or craft beer bottles). Thin soda bottles warp under heat and shatter unpredictably when drilled. Use a diamond-coated hole saw bit (12–16 mm) with constant water cooling—not a Dremel freehand. Drill at 300–500 RPM; go slower if you hear screeching or see white dust (sign of overheating).
Once the hole is clean and burr-free, thread a UL-listed socket kit rated for enclosed fixtures (not open-base pendant kits). Use E26 sockets with ceramic bases and silicone-insulated wire—standard lamp cord fails inside glass over time. Mount the base securely: hot-glue alone won’t cut it. Use epoxy putty (e.g., PC-7) around the socket collar for vibration resistance.
Pro tip: Fill the bottle 1/3 full with sand before drilling. It dampens resonance and reduces microfractures. And never use incandescent bulbs above 40W—LEDs (max 7W equivalent) are safer and cooler.
2. Painted Glass Bottle Vases: Beyond Acrylic Washouts
Glass bottle painting seems simple—until your design chips off after one handwash. The issue isn’t the paint; it’s adhesion and cure.Use enamel-based paints formulated for glass (e.g., FolkArt Enamels or Pebeo Vitrea 160), *not* craft acrylics. These require either air-drying for 21 days *or* oven-curing at 325°F for 35 minutes. Skipping the bake = guaranteed wear in high-contact zones (rim, base, handle grips).
Prep is non-negotiable: wash with vinegar-water (1:1), rinse, then wipe with >90% isopropyl alcohol. Let dry fully—no lint, no moisture film. Apply thin, even coats with a synthetic brush (natural bristles shed). Sand lightly between coats only if texture builds unevenly (220-grit, *dry* sanding only).
For layered designs (e.g., botanical silhouettes + gold leaf accents), seal *only* the painted areas—not the whole bottle—with a UV-resistant clear coat like Rust-Oleum Specialty Glass Paint Sealer. Full-bottle sealing yellows over time and clouds transparency.
3. Garden Markers & Terrariums: Where Function Meets Microclimate
Wine bottles make excellent weatherproof plant markers—when cut cleanly and labeled correctly. Avoid etching cream on curved surfaces; it bleeds. Instead, use a rotary tool with a fine carbide bit to engrave shallow, legible text (‘BASIL’, ‘THYME’) into the bottle shoulder. Then fill with matte black acrylic ink and wipe excess—ink pools in grooves, stays crisp for years.For terrariums: choose wide-mouth sauce or pickle jars (not narrow-neck wine bottles). Why? Airflow. Closed-loop terrariums need condensation cycling; narrow openings trap stagnant air and promote mold. Layer substrate in this order: 1” pea gravel (drainage), ½” activated charcoal (odor/microbe control), 2” potting mix (cactus/succulent blend for low-humidity species). Top with drought-tolerant plants: echeveria, fittonia, or baby tears—not ferns or mosses unless you open the lid weekly.
4. Upcycled Candle Holders: Safety First, Aesthetics Second
This is where most DIYers misstep. Pouring hot soy wax directly into an unprepared bottle causes thermal shock—especially with recycled glass that may have micro-cracks. Always preheat bottles to 120°F in an oven for 10 minutes before pouring. Cool wax slowly: cover poured holders with cardboard and let set 24 hours at 68–72°F (not on a cold countertop or near AC vents).Wick choice matters: for 3–4” diameter bottles, use LX-14 or CD-10 cotton-core wicks. Zinc-core wicks cause sooting and are banned in EU candle standards (EN 15493). Secure wicks with adhesive wick stickers *plus* a dab of hot glue at the base—double anchoring prevents float during pour.
Never use bottles with labels still attached—even ‘eco-friendly’ adhesives release VOCs when heated. Soak overnight in warm water + 1 tbsp baking soda, then scrape gently with a plastic credit card edge.
5. Bottle Cap Mosaics & Wall Art: Low-Waste, High-Impact
Don’t toss caps. Collect 100–200 (steel or aluminum—avoid plastic). Clean thoroughly: soak in vinegar + salt paste for 30 minutes, scrub with stiff nylon brush, rinse, dry.Mount on ¼” plywood or reclaimed wood panel (not drywall or MDF—too porous). Use Weldbond Universal Adhesive (waterproof, flexible, dries clear) instead of tile mortar—mortar cracks with wood expansion/contraction. Arrange caps in repeating patterns (hexagonal grid, concentric circles) or gradients (amber → green → cobalt). Press firmly for 10 seconds per cap. Let cure 72 hours before hanging.
6. DIY Bottle Insulated Grow Pots: For Urban Balcony Gardeners
Cut the bottom off a 1L soda bottle. Retain the cap. Drill 5–6 small drainage holes in the cap itself—not the base. Nest the cut bottle *inside* a second intact bottle (same size). Fill the gap between walls with vermiculite or perlite (not soil—it compacts and defeats insulation). Plant in the inner pot. The air gap buffers root temps by ±8°F vs. single-wall pots (Updated: April 2026, Cornell Cooperative Extension urban trials).7. Wine Bottle Bird Feeders: Predator-Safe & Squirrel-Resistant
Skip the rope-and-spike designs. They attract squirrels and injure birds. Instead: drill two ¼” holes opposite each other near the bottle base. Thread galvanized aircraft cable (not twine) through, knot *inside* the bottle, and hang from a shepherd’s hook. Fill with black oil sunflower seeds—their thin shells crack easily for small beaks. Add a 2” wooden perch below the feeding port, screwed *into the bottle’s glass* using a Tapcon masonry screw (pre-drill with diamond bit first).8. Glass Bottle Wind Chimes: Tuned, Not Random
Random bottle chimes sound like clattering trash. To tune: fill each bottle with varying water levels. More water = higher pitch. Use a chromatic tuner app while tapping gently with a rubber mallet. Mark water levels with a grease pencil. Seal with silicone caulk around the rim before hanging—water evaporation shifts pitch within 48 hours otherwise.9. How to Make Glasses from Wine Bottles (Yes, Really)
This isn’t novelty—it’s optics-grade repurposing. Only attempt with heavy, symmetrical bottles (e.g., Barolo, Rioja Reserva). You’ll need a bottle cutter (like the Eco-Cut Pro), a kiln (for annealing), and lens grinding compound (320 → 1200 grit). Steps:1. Cut bottle at consistent height (use guide tape + level) 2. Smooth edges on wet silicon carbide wheel (never dry grind—glass dust is hazardous) 3. Anneal in kiln: ramp to 1050°F over 2 hrs, hold 30 min, cool to 900°F at 90°F/hr, then off-ramp naturally 4. Grind lens curvature using template + compound; test focal length with sunlight projection
Time investment: ~14 hours per pair. Success rate for first-timers: ~40%. Most abandon after lens clouding or uneven thickness. If you’re serious, start with a local maker space that offers kiln access and mentorship—skip the $1,200 home kiln gamble. For a lower-risk alternative, explore our complete setup guide for beginner-friendly optical projects.
| Project | Time Required | Tool Investment | Success Rate (First Try) | Key Risk | Best For |
|---|---|---|---|---|---|
| Glass Bottle Lamp | 2.5–4 hrs | $45–$85 (drill bit, socket kit, epoxy) | 82% | Thermal fracture during drilling | Beginners wanting functional decor |
| Painted Vase | 1.5–3 hrs (plus 21-day cure or 35-min bake) | $18–$32 (enamel paint, alcohol, brushes) | 94% | Chipping from improper cure or washing | Gift-makers, classroom projects |
| Candle Holder | 2–3 hrs (plus 24-hr cool) | $22–$40 (wick, thermometer, scale, adhesive) | 77% | Wax sinkholes or tunneling | Small-batch candle entrepreneurs |
| Bottle Insulated Pot | 45 mins | $0–$12 (scissors, drill, perlite) | 98% | Overwatering due to false drainage cues | Urban gardeners with limited space |
| Wine Bottle Glasses | 12–16 hrs (plus annealing wait) | $1,100+ (kiln, grinder, safety gear) | 38% | Optical distortion or lens breakage | Advanced makers with kiln access |
None of these ideas require perfection. A slightly lopsided painted vase still holds flowers. A lamp with a visible drill mark casts warmer light. Sustainability isn’t flawlessness—it’s continuing the cycle with what you’ve got.
The most overlooked leverage point? Bottle selection. Not all glass is equal. Soda bottles are PET plastic (not glass)—ignore those. True glass bottles fall into three categories:
• Soda-lime glass (90% of wine, beer, sauce bottles): expands 9×10⁻⁶/°C. Safe for drilling, painting, candle use. • Borosilicate (e.g., Pyrex labware): expands 3.3×10⁻⁶/°C. Nearly impossible to cut without industrial lasers—don’t waste time. • Lead crystal: contains 24%+ PbO. Do *not* use for food, drink, or candles—lead leaches with heat/acid. Label and isolate.
Finally: track yield, not just effort. One 750mL wine bottle yields: • 1 lamp base + 1 small vase (if cut mid-body) • 2–3 garden markers (if cut into rings) • 1 insulated pot (cut bottom + nested) • 1 wind chime tube (if left whole)
That’s 4 functional outputs from one discard. Multiply across 50 bottles, and you’ve diverted 25 lbs of glass from landfill—and made something that sparks joy *and* lasts.
Glass bottle crafts aren’t nostalgia. They’re applied materials science, scaled to human hands. Start with the lamp or painted vase. Get the fundamentals right—drill speed, paint cure, wax temp—then branch out. Because sustainability sticks when it’s satisfying, repeatable, and quietly, undeniably beautiful.